All holidays are a good excuse for me to get elbow deep in the flour. This easter I thought it would be fun to tackle easter bread. After a little bit of online research I realized that traditional easter bread was not going to cut it. A sweet fruited bread was not what my mother-in-law had asked me to bring for dinner, she was looking for some nice hardy rolls to accompany the piles of potatoes and gravy and ham and beans that would fill the table. YUMMM (I'm still eating the leftovers even today for lunch)!
If you are not familiar with easter bread, it is traditionally greek and italian. It is a sweet braided loaf that has whole raw eggs braided into the loaf, usually dyed red, to symbolize Christ's rebirth at easter. The raw eggs bake with the bread. It is a novel treat and looks very nice in the center of the table. I personally had never heard or seen it until this easter season while I was trolling the web for easter egg ideas. I can't usually resist novelty recipes! LOL, sucker for disappointment I guess (some day I will post about sauerkraut cake). Next easter I will attempt Peep pie!
I used RECIPE & LINK.
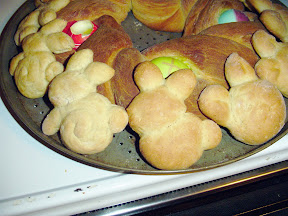
This site seemed to be the most in tune with that I was looking for. I have never made bread without my breadmaker before, so it is very possible that I did not kneed this bread enough. But it was fun dying the eggs! This picture is before I let it rise. I'm never sure where the best place to let bread rise is in my house. We have an Energy Star refrigerator that is not very warm on top and my oven temperature starts at 170F degrees (which I am pretty sure is too hot to rise in). Any suggestions would be awesome!
During the baking we heard a POP and discovered that one of the eggs had blown its lid! Hubby thinks that egg might have been cracked and caused it to pop, guess we will have to experiment with that in the future. The bread looked beautiful when it was done. Even though it is really brown it is not burned, that is from the melted butter brushed over the top. I even ate one of the eggs and it is just like hard boiled!
I knew that one loaf of bread was not going to be enough, and that some people might be put off by the while eggs in the bread, so I made a batch of rolls to go along with it. I was inspired by these absolutely cute bunny shaped rolls I saw online. (I see a lot of things online. It is quite possible that I may spend TOO much time online... no way!) I did a couple different versions 'cause I wasn't sure if they would still look like rabbits after rising and baking. The next batch will just need a little bit of adjustment (lengthening of the ears) and they will be perfect. Well, maybe perfect would be making them out of cinnamon rolls, yeah THAT would be perfect!
The bunnies baked up nicely though they could have used a little longer rising time as well (and a little less baking time). I was multi-tasking with my weekly pizza night with friends and this bread - the bunnies got forgotten for a couple minutes in the oven longer than they should have! I know - no excuses. I will do better next time, I promise.
Overall the bread was ok - beautiful but ok. The recipe needs some tweaking, mainly a longer rising time. And I need to be extra careful to check my eggs and make sure they are not cracked or punctured anywhere. I think that might avoid the top blowing off of the eggs in the future. I hope. This recipe was not nearly as intimidating as I thought would be. And it was a blast! I love reverting to childhood activities - egg coloring is going to be a tradition in our childless house!

I know it is a little late for St. Patrick's Day, but I got this idea in my head that I couldn't shake. Why couldn't I make my own slice-n-bake cookies AND have cute designs in the middle like the store bought kinds? I seem to remember a slice-n-bake cookie by Pillsbury that had a shamrock in the center. I must be getting old, because I can not find them any more! Oh well, guess I will have to make my own. :) I started out with the vanilla ice box cookie recipe from Baking Illustrated and went CRAZY with the food coloring.
Then I started rolling out green snakes. After a little bit of finagling I got myself a semi-shamrock cookie. 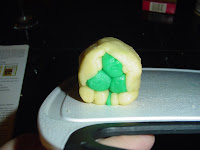
This is a lot of fun! I went on to do an easter egg and then just went crazy blending the colors with the left over bits of dough. My husband came home in the middle of my baking and wondered if I was cooking Playdoh! 
After about an hour of chilling they slice very nicely and can be layed out to bake.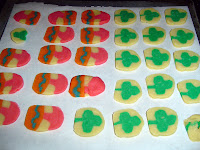
The finished cookies look and TASTE like the Pillsbury cookies I remember. I brought them into work the next day and one of my co-workers didn't believe that I had made them by hand at home. Now that is a good feeling. :)
This is a great recipe for kids or adults that are kids at heart! My husband and I gobbled them up. Enjoy!
Post Recipe Here
My chocolate craving never really goes away - just some days are worse than others. Well, today I was drooling and webcrawling via Google Image Search "how to make chocolate". I came across a great blog for the scientific baker with an AWESOME picture tutorial on how to shape croissants. Second to chocolate, I can't stay away from pastry so... this is just making me slobber all over my keyboard! Take a look for yourself. Thanks Joe!
P.S. I really got sucked in to Joe's Blog. He has a really easy bread recipe listed that just taunts me to try and make bread without the mechanical crutch of my bread maker. And the photo tutorial on petits fours - DUH! I have no idea why it never occurred to me to dip the sides of the cakes instead of wasting all of my precious frosting by dripping it over the top and having it run down the sides!

I did it! My Fudge Cup Concoction is ready to blog, and yummy too! I tackled it a couple nights ago (and trust me, tackle IS the correct word) and now it is ready to devour. My hubby kindly accompanied me in the kitchen during my baking craze and was hovering at the end... eventually he couldn't take it anymore and stole a fudge cup! I think I will take that as a compliment. :)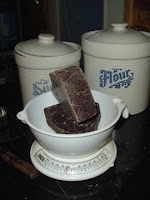
So I start out with my highly coveted bulk chocolate bar. (Hubby has been known to grab a chunk and run occasionally) Weighing in at around 26 oz of semisweet chocolate total. My stash is getting low, so this recipe better be worth it! 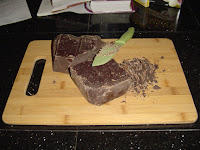
I can't really melt down the big chunks in a pot - it would be too messy and uneven heating... (I hate the smell of burning chocolate!) So I get to chop! I love chopping, especially with my new Pampered Chef knives. I make a huge mess and have chocolate all over my hands and the counter!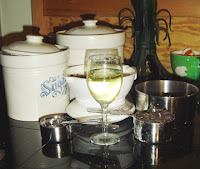
Now that I have the chocolate chopped and measurable it is time to get all the ingredients together. Wine is an absolute necessity if I am in the kitchen, this one is a sweet bubbly Moscato d'Asti from the Traveling Vineyard. (I guess I kinda get sucked into those tupperware-type parties!)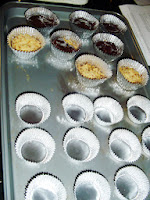
I have two size cupcake liners, small and large. I made a coconut shortbread (from the wonderful BakingBites website) to line the bottom of the larger liners because that is just a massive amount of fudge otherwise. I'm not saying that I am not up to the challenge, I'm just saying that I don't want to see people hurting themselves because they can't stop. Hahaha
Next is a recipe from Allrecipes.com for a double layer fudge called Raspberry Truffle Fudge. They call for raspberry liquor in the top layer but I am feeling the coconut rum tonight! The first layer comes together nicely though it is a bit sticky - I was kinda hoping that I could pour the fudge into the cups, but it looks like I will have to kinda press it in. You can see me starting to do that in the picture above. 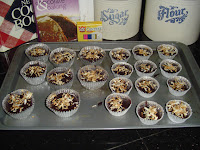
The second layer from the recipe is more of a ganache - actually it IS a ganache (pssst.... by the way, I LOVE ganache). This layer pours nicely and I just need to give it a little bit of a push with my tablespoon to fill in to the sides or the cups. I toasted some coconut to go on top of the finished cups and figured it would be nice to have a little bit of a crunchy surprise in the middle... so I sprinkled some on top of this layer. While I was distracted hubby managed to steal a spoon full of the ganache and roll it in the toasting coconut! Luckily I made way more than enough. 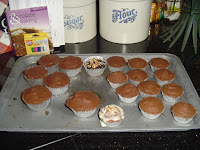
I figured that a bit of whipped ganache would be perfect on top of this super sweet concoction AND it makes them look like actual cupcakes. BEWARE any potential consumers! A big bite into these will not reveal a soft cushion of cake and filling but an intense explosion of chocolate and smooth velvety cream!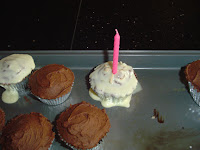
I thought maybe I would save someone the pain of breaking their sweet tooth by adding a layer of white chocolate ganache glaze on top to warn of the candy underneath - kinda like the chocolate shell on the outside of a truffle. WELL, apparently I suck at white chocolate ganache! I can not get it to firm up! My ratio of chocolate to cream was 1 to 1, then I up-ed the chocolate so it was 1.5 to 1. Still no luck... I will try again with some whipping but I am not holding my breath.
In the end I had a very nice treat for my mother's birthday!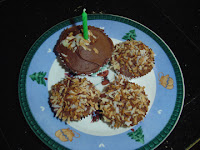
Happy Birthday Mom!
Notes for Perfection:
~ The coconut layer on the bottom of the big cupcakes is a perfect match to the rich fudge on top. If anything, add a little more salt to this layer, but not too much!
~The first half of the fudge layer was too think on some of the cups, Make sure to use a nice even thin layer (maybe 1/4 inch).
~The Second half of the fudge layer (the poured ganache) was not anywhere near coconut-y enough. Add cream of coconut next time? And this layer could us a little more, double next time so that is can be an equal thickness to the layer beneath.
~The toasted coconut in the middle was great but caused the cups to separate... not sure what to do about that.
~Be careful of over whipping the "frosting" ganache. Maybe pipe it on top next time instead of using a spoon.
~Practice, practice practice on the white chocolate glaze to find one that sets up nicely and doesn't turn transparent.
Well, my mother's birthday is quickly approaching (March 13th) and I have been looking for an excuse to bake again. After those Homemade Hostess Cupcakes, I'm itching to get back to it!
So, chocolate + rich = fudge, right? Or truffles which = ganache (one of my very favorite things). And it is always fun to throw in a little liquor for a special occasion! One of my coworker's and I sat down at lunch yesterday and talked it over and here is what we came up with:
Sounds absolutely sinful, huh? I will try to put it together tonight and hopefully I will have a how to blog for you soon. (If there are any left!)


Chocolate still runs through my blood. I have a standing date every Sunday afternoon with my inlaws where I usually provide dessert.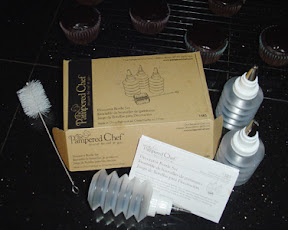
This week my MIL gave me the Pampered Chef Decorator Bottle Set to use. So after a little bit of brainstorming I decided cupcakes were the way to go. Easy to eat, always pretty to present & fun!
After a bit of websearching I came across Nicole Weston's blog Baking Bites and her filled cupcakes. AHH HA! Just the thing! Her Vanilla Cream Filling looked just as I remembered the filling for Hostess Cupcakes - and trust me it, it is!
So... Now I am pretty sure I am going to make a homemade version of the classic Hostess Cupcakes.

I really enjoy making recipes from scratch BUT I also enjoy the ease of boxed products at times. For this recipe I used Betty Crockers Super Moist Triple Chocolate Fudge Cake mix for the cupcakes. While the cupcakes were cooling I moved onto Nicole's Vanilla Cream Filling recipe. It is a unique recipe to me... kind of has a roue type mixture that you mix with the creamed butter and sugar. Wonderful texture! After the filling was prepared I started to disect the cupcakes. Nicole's method for cutting out a cone shape worked well, but I was craving a bit more filling and ended up scooping a little more cake out with a spoon. The Pampered Chef Decorator Bottle set was too small to efficiently use for filling the cakes, but I had fun with it any way! 
After assembling them I was torn between frostings. I really enjoy the eye candy of the frosting on the cover of The Cupcake Cookbook by Catherine Herman & Laurence Sombke but thought it might be too much with the filling. So I opted for a Hershey's traditional recipe for chocolate glaze from the Hershey's Easy Baking cookbook. The finished look is glossy and enticing and nicely hides the seams from the filling assembly!
CHOCOLATE GLAZE
Melt 2 tablespoons butter in a small saucepan on low heat.
Add 2 tablespoons cocoa powder and 2 tablespoons water
Cook stirring constantly until smooth and slightly thickened (Do not boil)
Remove from heat
Add 1 cup powdered sugar and 1/2 teaspoon vanilla
Beat with wisk until smooth
VANILLA CREAM FILLING from Nicole Weston's blog BakingBites.com
Whisk 3 tablespoons flour & 1/2c milk in a small sauce pan
Cook on medium heat until thickened, stir continuously and do not boil (This will take a few minutes)
Strain (if you have chunks) into a bowl and cover until cooled to room temperature.
Meanwhile, Cream 1/2 c shortening & 1/2 c sugar
Add cooled flour mixture and vanilla
Beat on high until light and fluffy (About seven minutes)

Yesterday my focus was on chocolate.
I made the guilt-inducing trip to the vending machine TWICE and ended up empty handed both times.
I could have taken that as a sign to be good and try to forget about the taste of chocolate in my mouth, but somehow it just made me more determined to feel that sweet velvety goodness that only chocolate can bring.
So, I did a little hunting around on my favorite recipe website and found the perfect recipe.
Perfect : ingredients including all items or substitutions already in my pantry, simple to make, easy to share
Chocolate Truffle Cookies did just the trick. (see picture above) All I did was replace the chocolate sprinkles with cocoa nibs and I am in heaven! Sinful hot - decadent cool - intriguing frozen
I plan on posting more baking blogs in the future - so keep your eye out! TTYL - Mindy
Link to SVZ & Mutual Linkers
 |  |  |  |  |
||||
 |  |  |
||||||
 | | | | |


